
Requirements
A requirement describes an outcome or condition a system should meet. SES Modeler lets you document it, assign its subject, and record satisfaction relationships to parts.
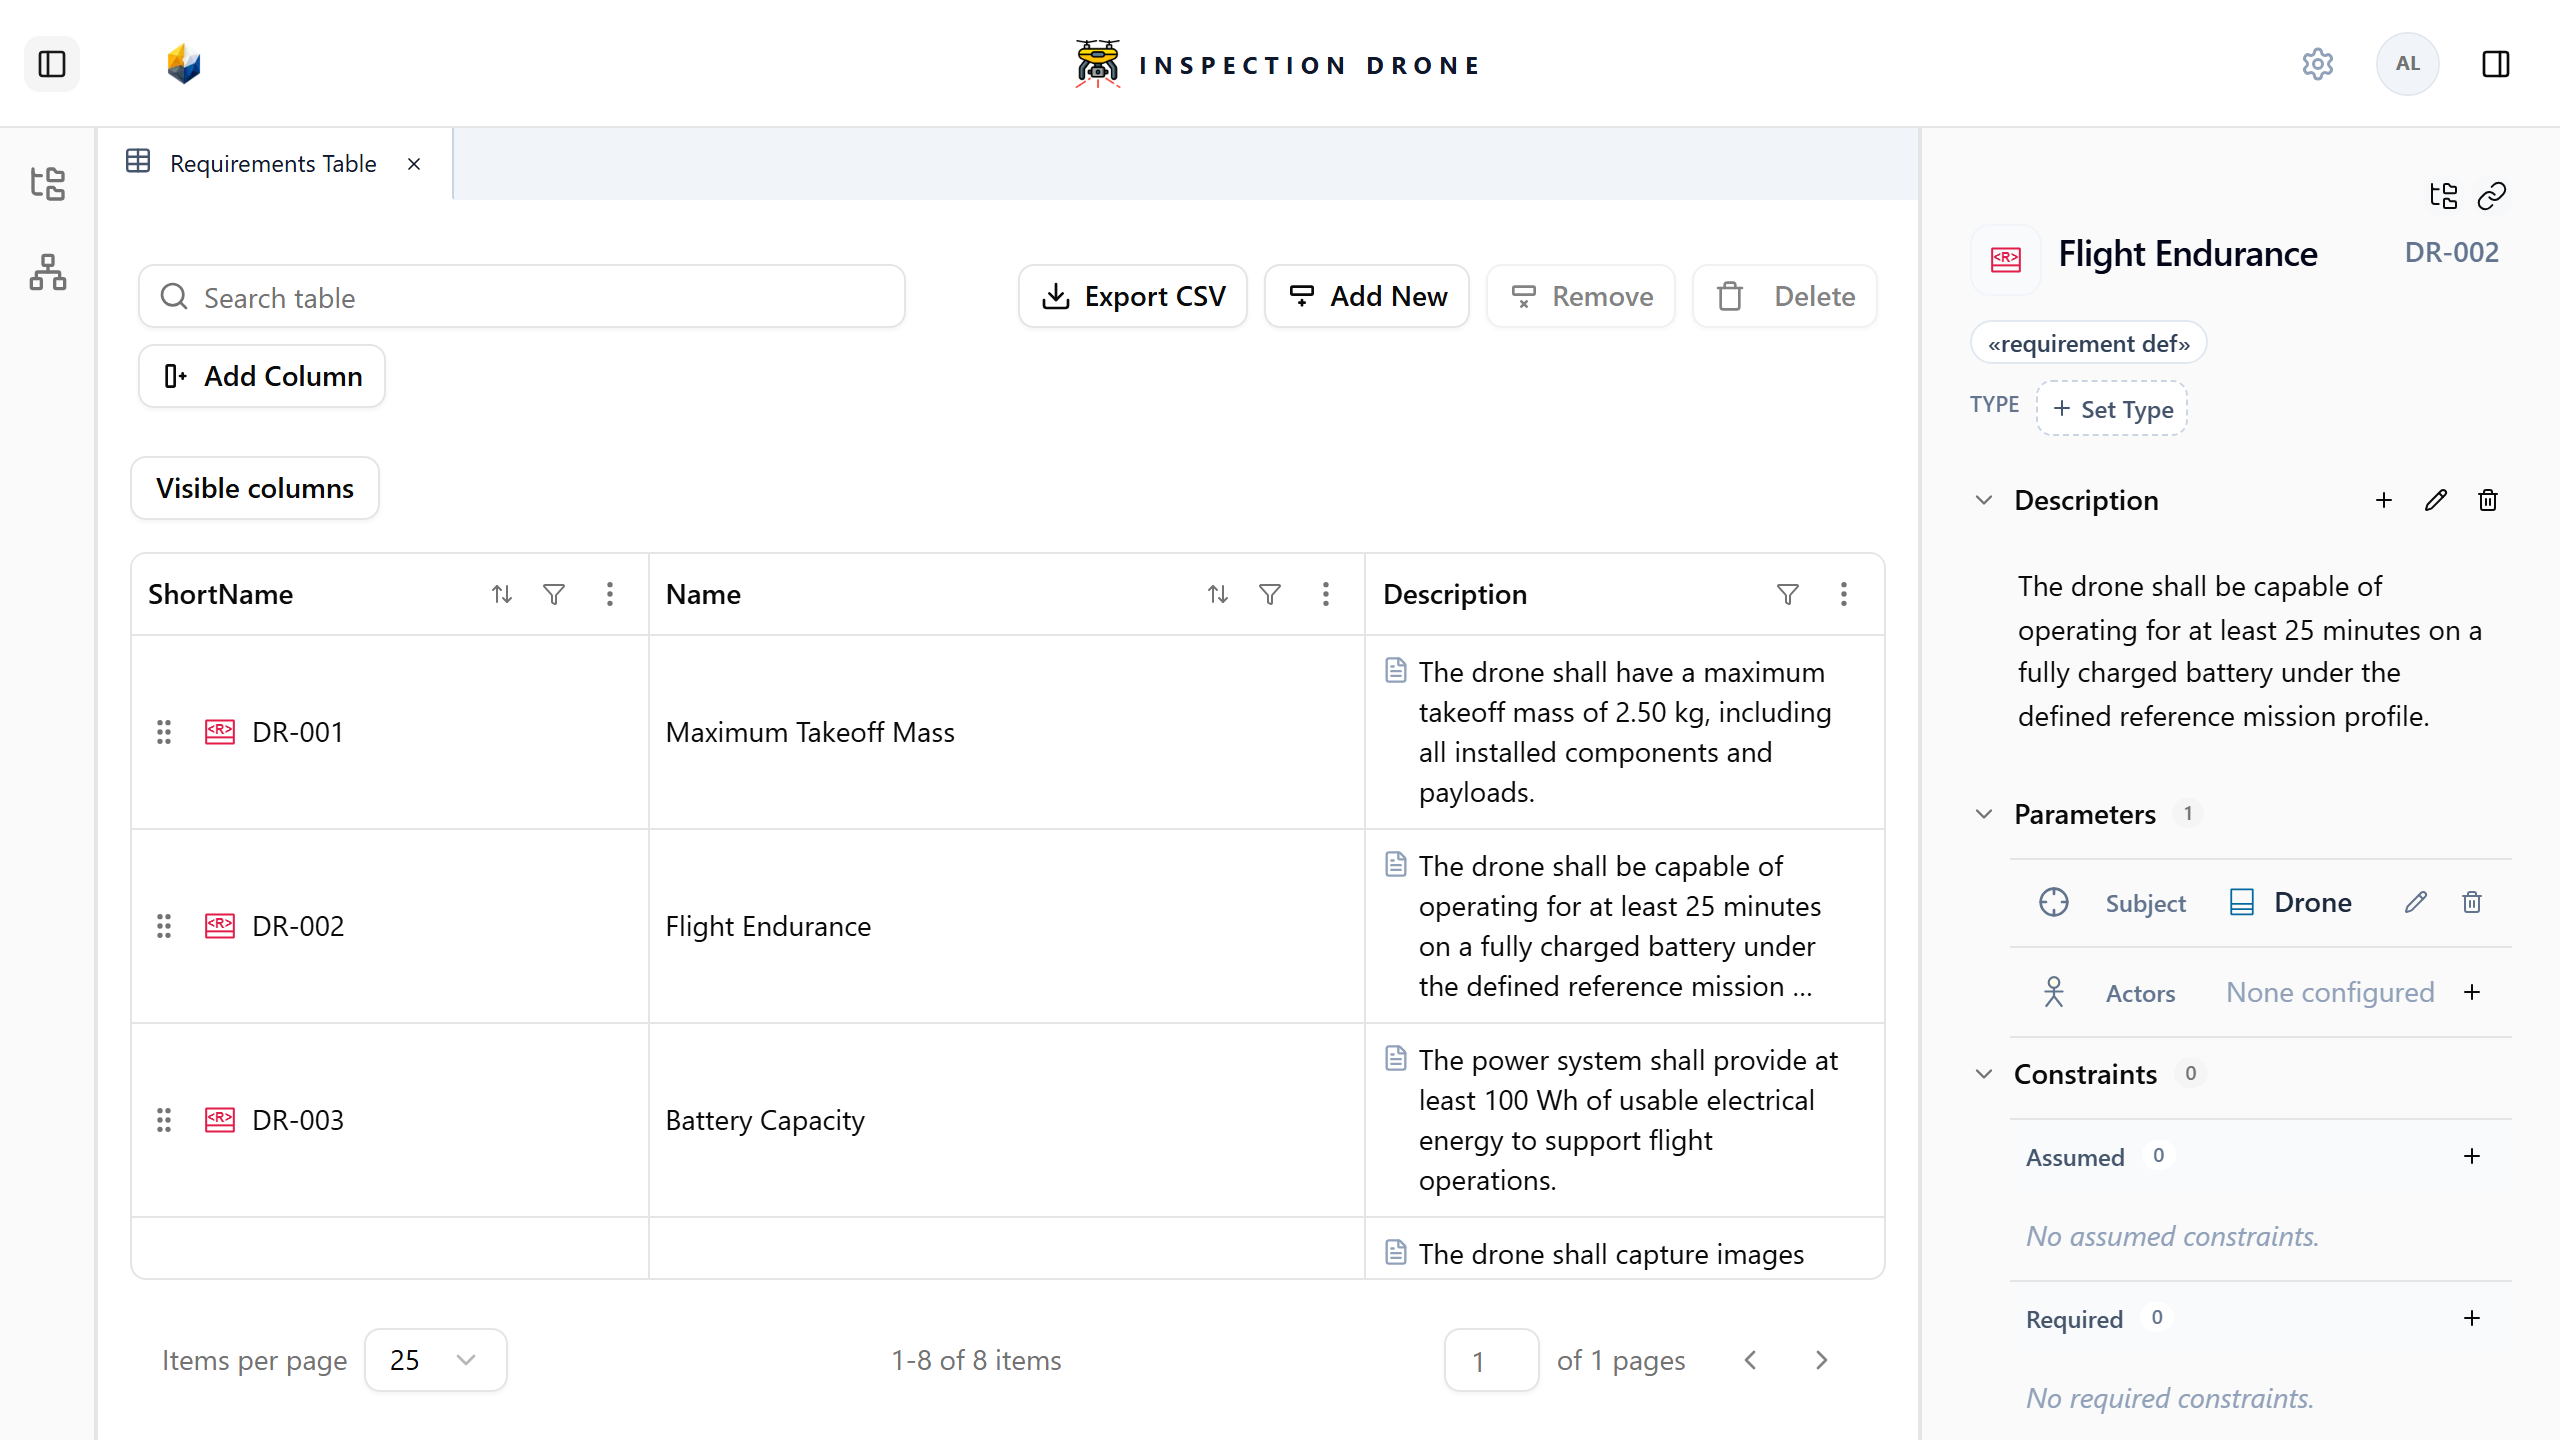
What you need
Use an editable model containing the system being constrained and a part you want to identify as satisfying the requirement. Build your first model explains preparing structural elements from an empty repository.
To review satisfaction in a matrix, the installation needs the RelationshipMatrix view kind. The steps below create a requirement and view in your own model.
1. Create and explain the requirement
- Choose a package to own the requirement. Create a package with Create Element → package if necessary.
- From its menu, choose Create Element → requirement def.
- Enter a name describing the required outcome and press Enter.
- Select the requirement. Use Add short name to enter your identifier, or Edit short name to change one.
- Expand Description, choose Add documentation, write the condition or outcome, and finish with the editor’s checkmark.
Check: selecting the requirement again shows your identifier and description.
If requirement def is missing, check the package owner and model editability. See Element documentation for description editing.
2. Assign the system being constrained
- Select the requirement and expand Parameters.
- Choose Set subject.
- Search for the system element or definition the requirement constrains. Use the result’s kind and owner to identify it.
- Select the result and wait for the assignment to save. Use Replace subject to change an existing assignment.
Check: Subject identifies the element you chose. This assignment records what is constrained; it does not create a satisfaction link.
If the subject is missing, check that it exists and is available in the current model context. If assignment controls are absent, check the selected requirement and edit access.
The inspector also separates Assumed and Required constraints. Documentation and subject assignment do not automatically create executable conditions.
3. Set up the satisfaction matrix
- From a package’s menu, choose Create View → RelationshipMatrix, name the view, and open it.
- Choose Expand toolbar if its controls are collapsed.
- Under Rows → Element type, choose Part (definitions and usages).
- Under Rows → Scope, select the package containing the parts you want to review, then choose Apply scope. That scope includes its contents and descendants.
- Under Columns → Element type, choose Requirement (definitions and usages).
- Set the column Scope to the package containing your requirements and choose Apply scope.
- Clear Search rows and Search columns, and turn off Only related on both axes while preparing a new link.
Check: the intended part appears as a row and requirement as a column. Search either axis by the actual element name to isolate their intersection.
If RelationshipMatrix is unavailable, check the owner and view library. For an empty axis, check scope and type, clear its search, and turn off Only related. Use Model in Scope and Apply scope to check whether a narrower scope excluded the element.
4. Create the satisfaction relationship
- Find the intersection of the part that should satisfy the requirement and the requirement’s column.
- Right-click an eligible empty cell and choose Create satisfaction.
- Wait for the relationship to be created. You can also double-click an eligible empty cell, or select it and press Ctrl+Enter (Cmd+Enter on macOS).
- If the cell already contains the intended satisfaction link, proceed to inspection.
Check: the cell contains a satisfaction symbol. The model records a relationship between that part and requirement.
Use a single click or the context menu to examine occupied cells. Double-clicking an occupied cell with one editable satisfaction can delete that relationship.
If Create satisfaction is unavailable:
- Check that the row is a part, the column is a requirement, the link does not already exist, and the model and view are editable.
- Read a shaded cell’s tooltip or selected-cell explanation. A requirement owned inside another definition may be inaccessible from the chosen part’s context. A package-owned requirement is suitable for this workflow.
- Use Reload cell context if loading failed, or Retry checks if eligibility could not be checked.
5. Inspect the relationship
- Right-click the populated cell and choose Inspect relationship. Select its submenu first if several relationships occupy the cell.
- Expand Satisfaction in the inspector.
- Confirm that Requirement and Satisfied by identify the intended elements.
- Use Select in Model Browser from the cell’s menu to locate the relationship in the tree.
- Choose Refresh in the matrix toolbar to review the saved link.
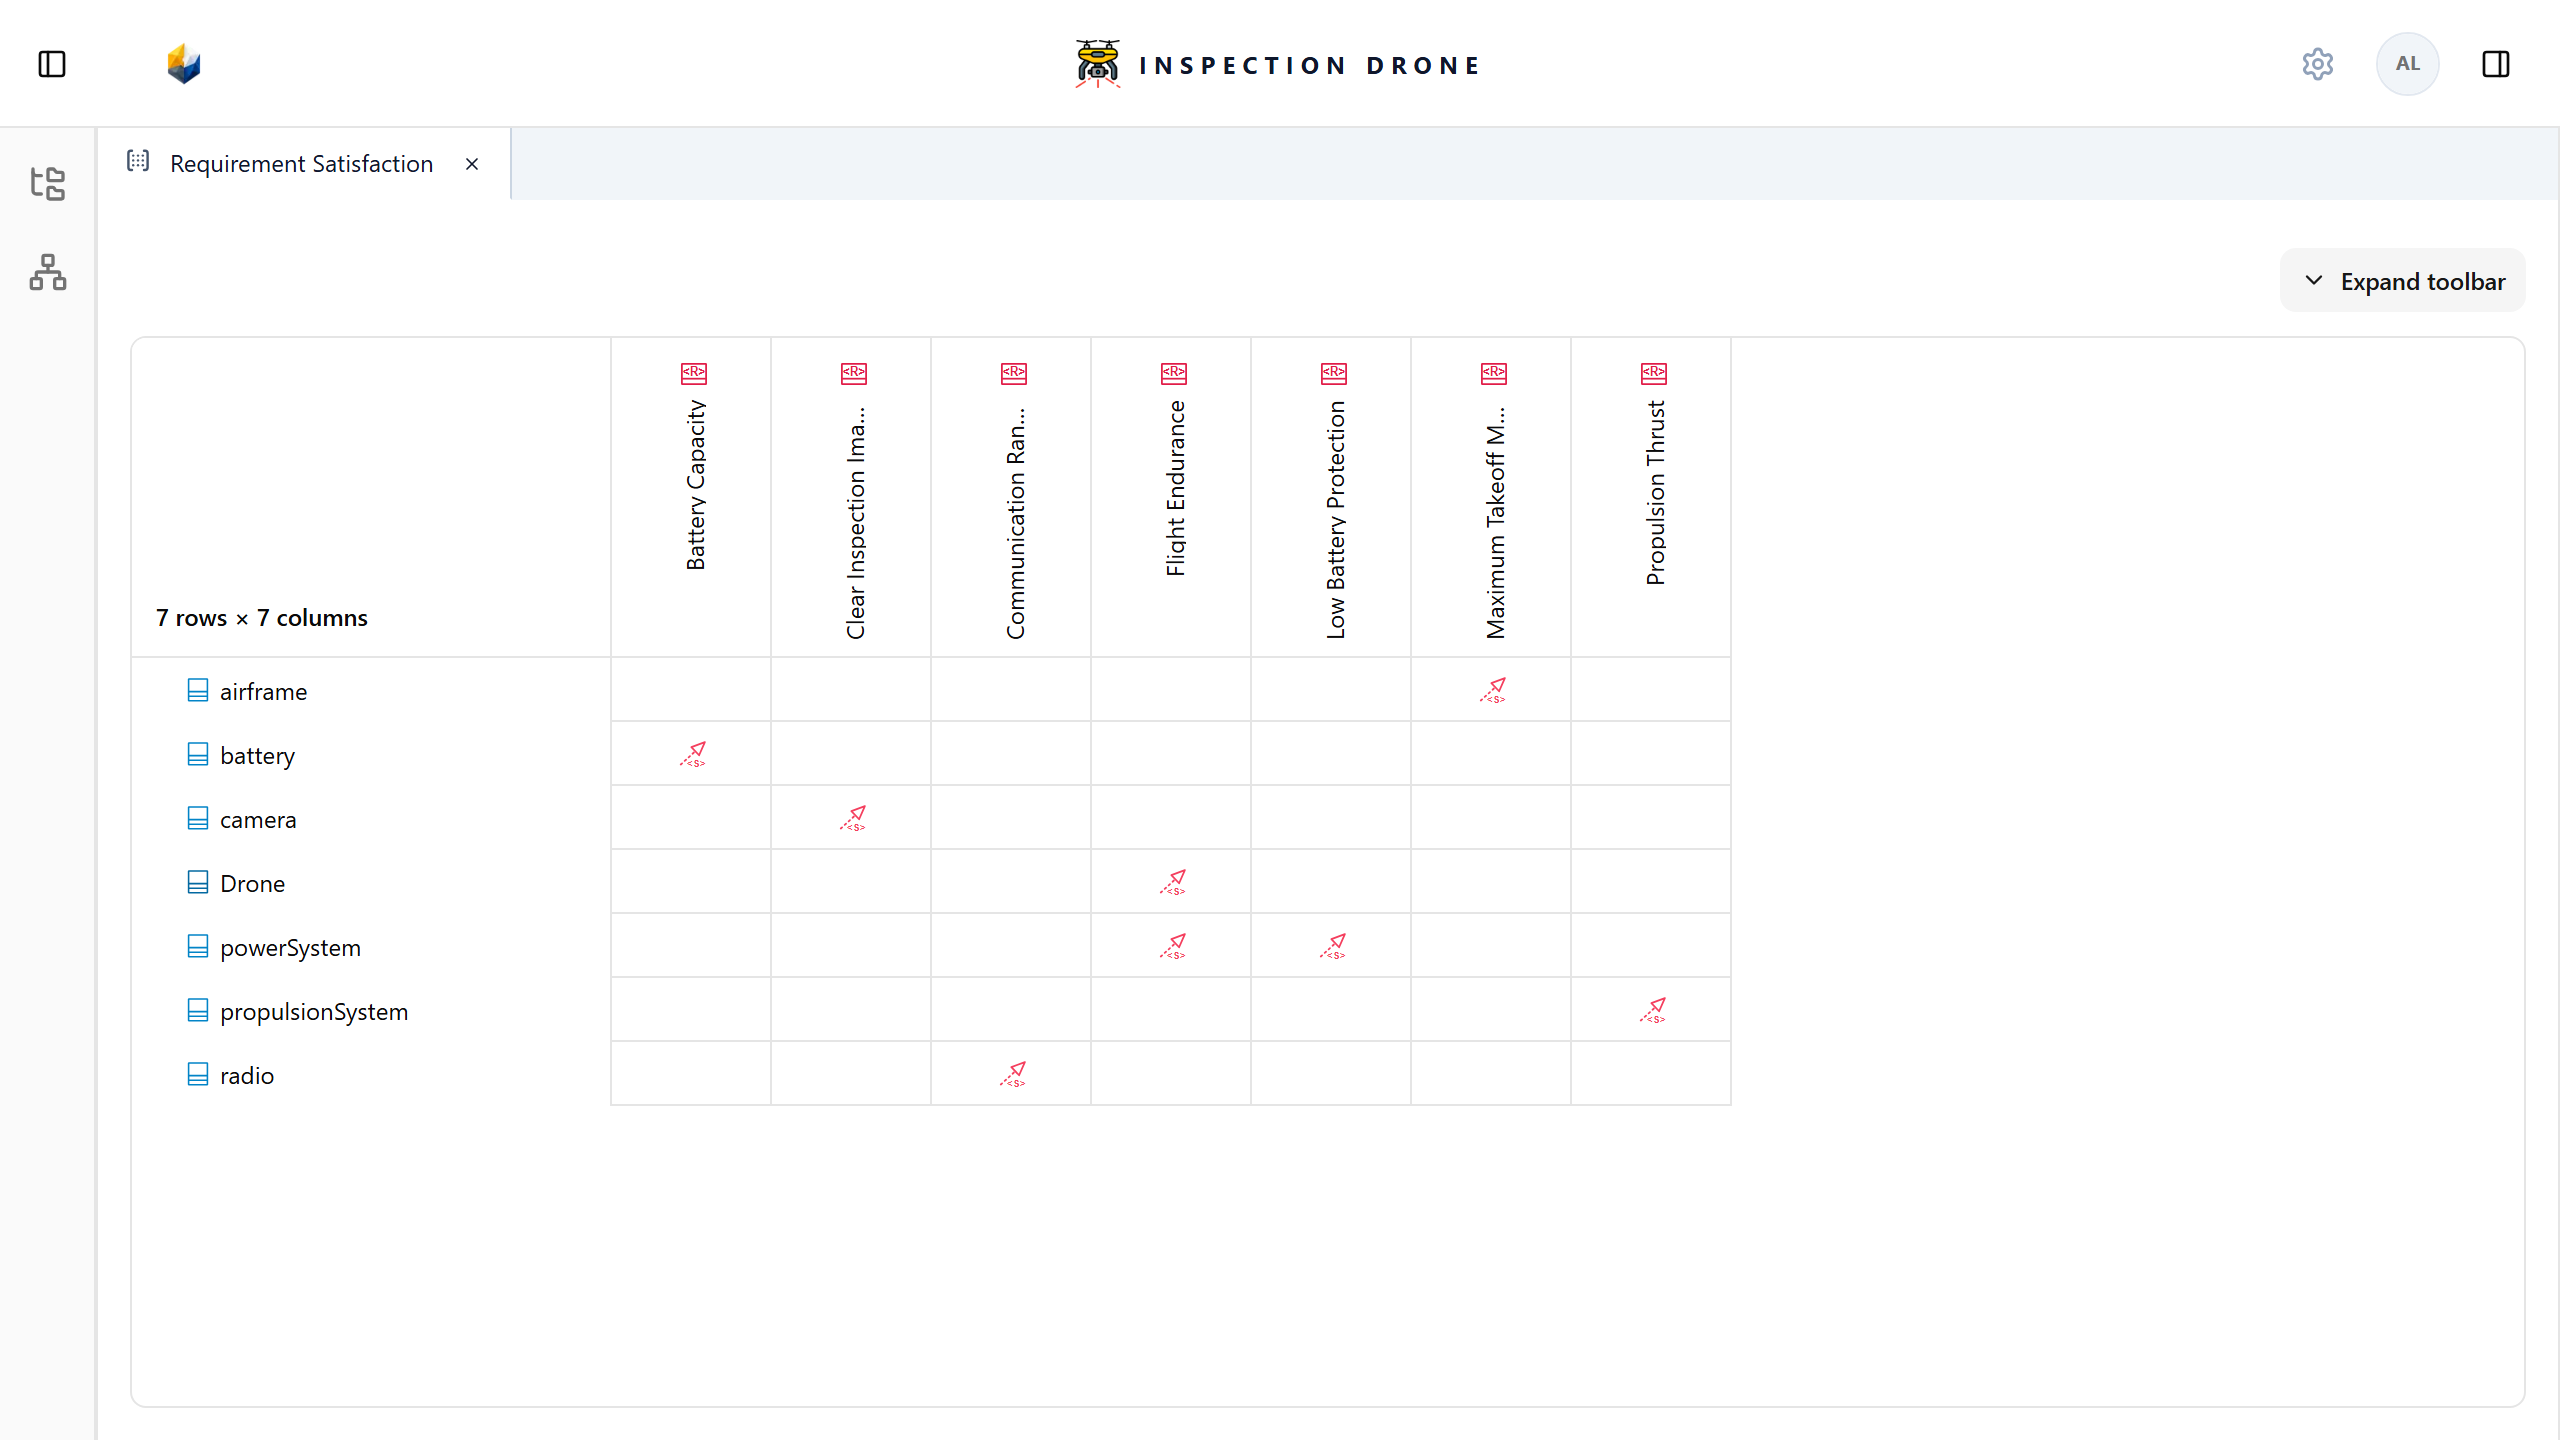
Check: the matrix and inspector identify the same explicit satisfaction relationship. If Inspect relationship is missing, wait for cell context and confirm you selected an occupied cell. Reopen the inspector sidebar if necessary.
A satisfaction relationship records a modeling assertion. Keep acceptance criteria and verification evidence explicit; the link alone does not prove the requirement is met.
Continue with Use cases.

